
Many users of photoshop don’t seem to ever get their hands dirty in the animation tools that Photoshop gives you. Well, this post is here to help you to start using more than $50 worth of photoshop!
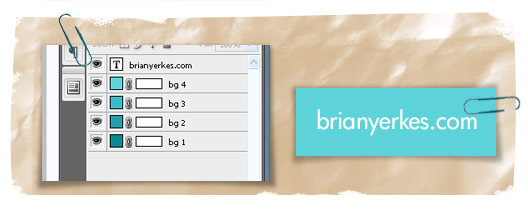
First , we need to create our image, with all of the layers that will make up this animation. In the image below, I have 5 layers. 4 different background color layers and one text layer. The animation I want to achieve is simply to have the background color change thru the different colors. Very basic animation but it is a good start in learning how to animate in photoshop.

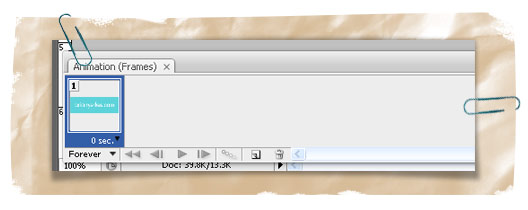
Now, we need to open up our "Animation" window (have you ever opened this up before?!) Go to "Window > Animation" and the animation panel should pop up at the bottom of your photoshop interface.
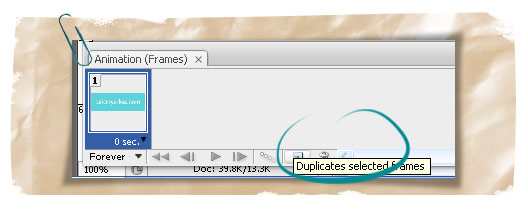
To start building our animation, we need to create "frames" in the animation panel. Click on the icon "Duplicate selected frames". This will duplicate the first fame already displayed in our animation panel. I am going to create 4 frames for this simple animation; One frame for each background color.
Once you have the correct number of frames that you want, now we need to determine what layers are to display in each frame. So, for the first frame, I want the dark teal color to show up along with the text layer. Click on the "eye" icon to hide the layers that should not be visible in the first frame. For this animation, I am hiding the other background colors for the first frame.

Complete this step for each frame in your animation, hiding and showing the correct layers for each frame.
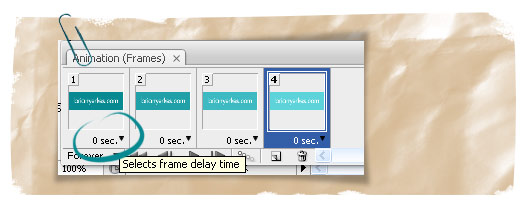
Now we need to decide how long each frame should display for….for my animation, I will make each frame show for 2 seconds. The image below shows you where to click to control the seconds for each frame.
After you have added the timing, test your animation. Click on the play button at the bottom of the animation panel and you should see your animated gif in action.

There you go! You just learned how to create an animated gif using photoshop! Let’s not stop there, there is one more little tool that will help you to create more advanced animated gifs. We are going to use the "tween" tool.
Using Tweening
*NOTE** If you are going to create an animation using tweening, leave the timing set up until last. If you do this first on your original frames, each tween frame added will have the same time delay on each new frame as the original ones.**
To keep with our previous animation, let’s say I now want the text "brianyerkes.com" to scroll up and down as part of my animation. I need to move the text layer in each frame set this up.
In the first frame, move the text layer to the top of the document, and off of the displayed area. On the next frame, move the text to the bottom of the document, off of the displayed area.
So now, your first two frames should not have text visible inside them when you are looking at your animation panel. Repeat these steps for the other 2 frames, one with the text at the very top and one with the text at the very bottom.
With the first frame selected, click on the "more" icon on the very right top of your animation panel.
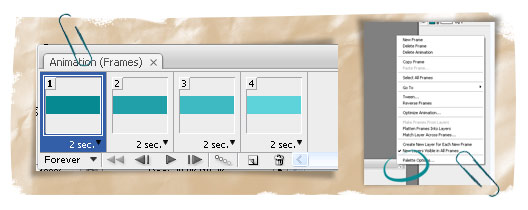
Click on "Tween", and you will be given a few tween options like frames to add for the tween animation. You can play around with these settings , but for this animation, I have used the default of 5 frames and tween with the "next frame". Hit "ok" and you should see your new frames added to your animation panel.
Continue to the old 2nd frame; now my 7th frame after the tween addition. Add a tween to this frame and do this for the other original frames. On the last original frame, you will need to select "First Frame" in the drop down menu for which frame to tween it with.
Play around with the time delays on each frame including the tween frames, and you are now ready to play your animation and test it out! If it looks good, go to "Save for web & devises" and select "gif". Done!
Ugly animation but at least it shows you how to achieve this!

